
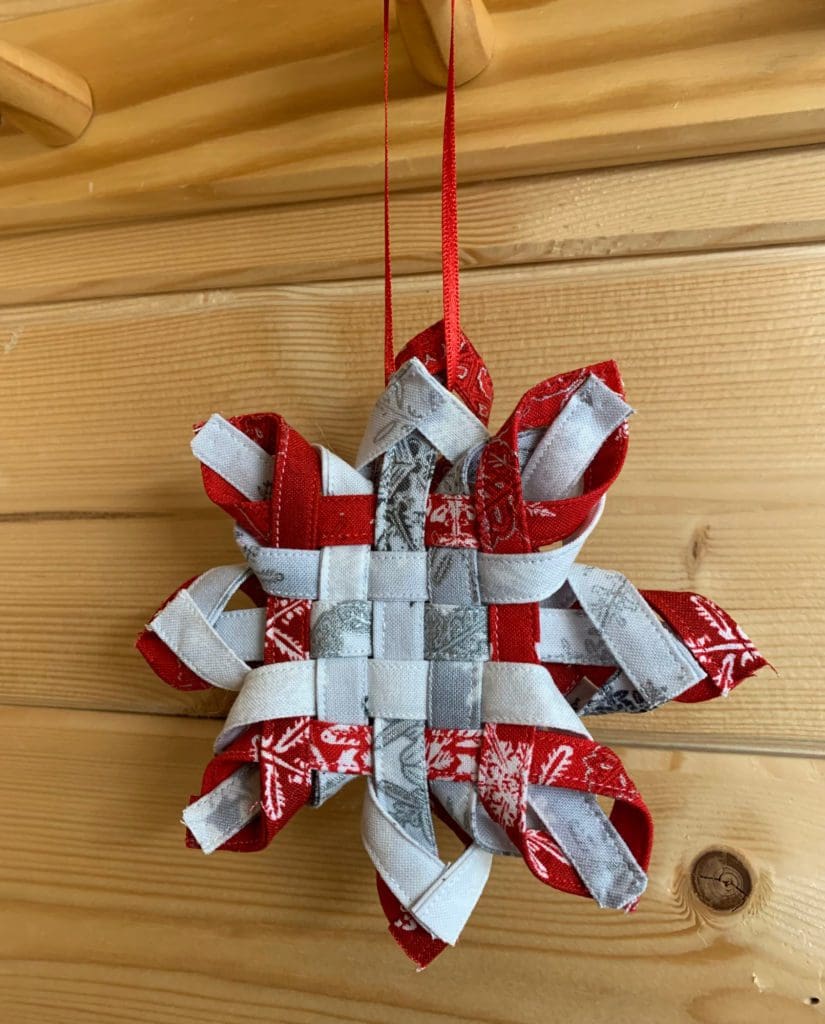
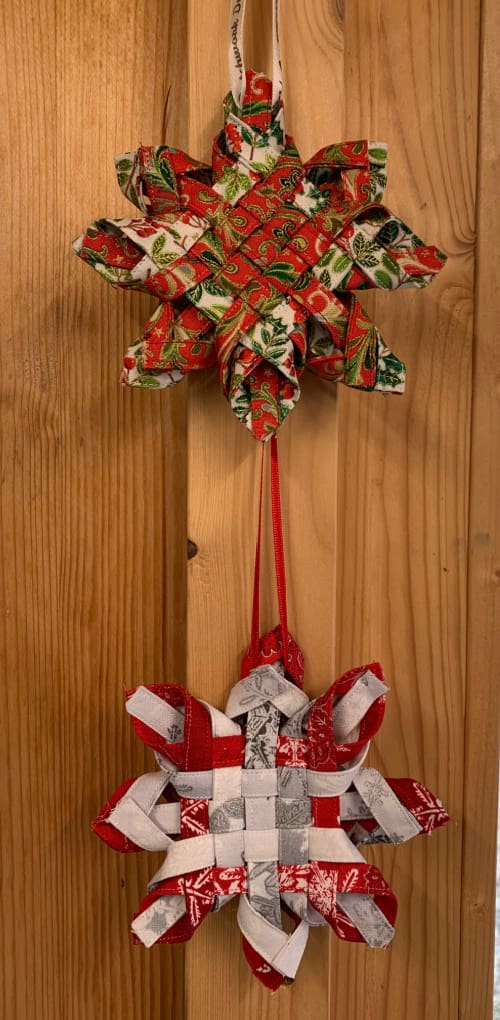
3D Fabric Star
This star seems to come under many names, woven star, Swedish advent star, fabric star to name but a few. Whatever it is called I love it. It’s something I have been meaning to make for a good few years so this week I had a go and followed the Mister Domestic your tube tutorial.https://www.youtube.com/watch?v=XeuKdgoEYTg I do not have the weaving tool he suggests but got by just fine without it, it’s such a small section to weave there really is no need just make sure you keep the weave tight.
Requirements List
1 Width of Fabric by 1.5 inches If using fat quarters just cut double the number of strips.
2 Width of Fabric by 1.5 inches If using fat quarters just cut double the number of strips.
Quilting clips or small bulldog clips
Sewing machine
Rotary Cutter, cutting board and quilters ruler
Pressing Pad and Iron (travel iron is perfect
Skinny ribbon or cord for hanging
***
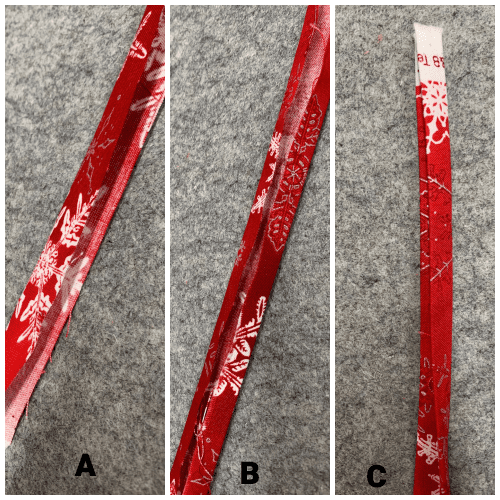
To start fold the fabric strips in half length wise and press so you have the centre of the 1.5″ marked with a crease line, Picture A. Open out again and put the raw edges into this crease line and press Picture B. Fold back in half so the raw edges are enclosed Picture C.
Stitch as close as you dare to the long edges on both sides ( I used a zipper foot) with a blending or decorative thread. Trim off the selvages and cut into 5 inch lengths. You will need 12 of one fabric (the main fabric white in these pictures) and 8 of the other (red in these pictures)
From your main fabric pin three strips fairly firmly onto your pressing pad. On either side of this pin one of the other fabric. If there is a better side of your strip put that pad side down as what we are seeing now will be on the inside of the finished ornament.
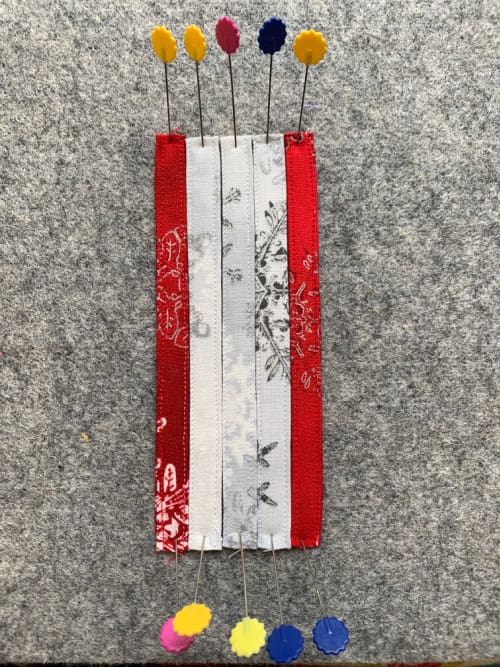
Weave as pictured below with one of the main fabric strips. Measure to make sure it is in the middle. Pin as before.
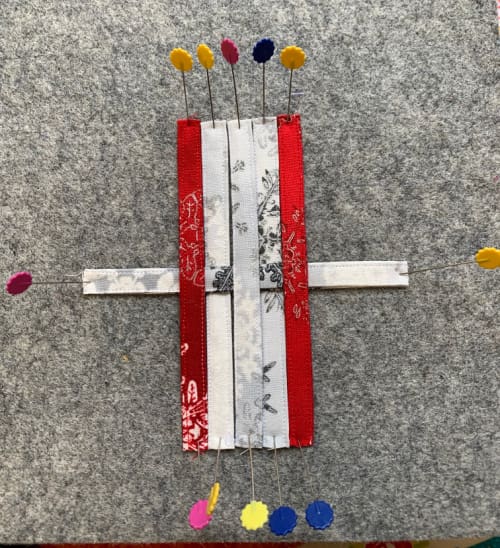
Weave with the main print strips one on either side of the first one, basket weave style see picture below. Keep firmly together and pin.
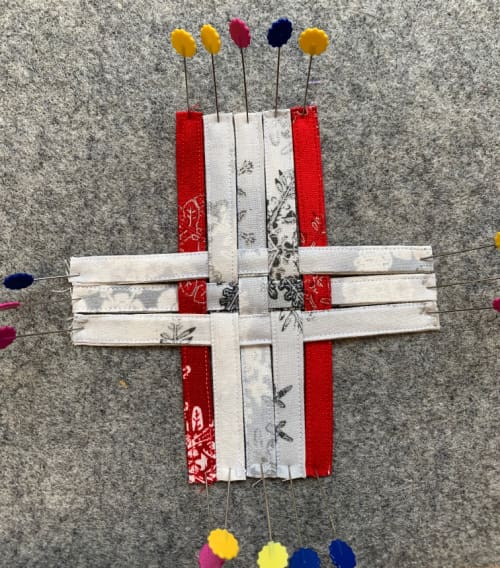
Finally weave the secondary fabric strips one on top and one under the three main fabric strips.

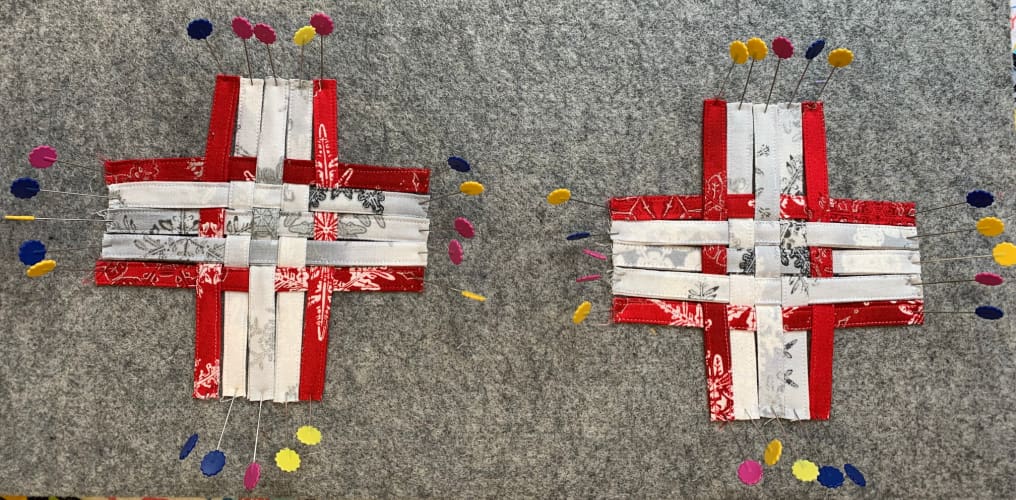
Repeat this so you have two matching weaves.
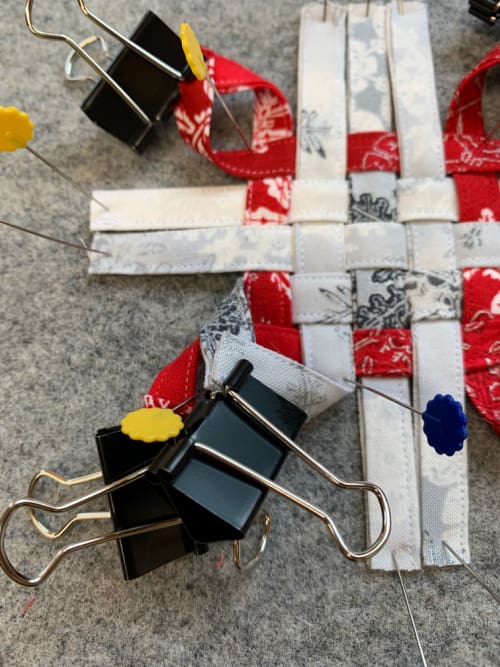
Now the fun begins! On the cross over points marked with the green spot in the picture below put a little glue between and pin into place.

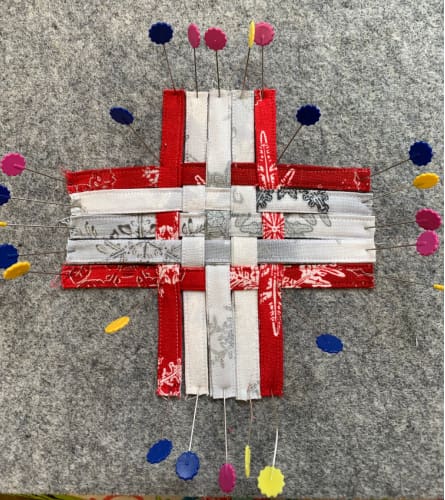
Take the pins out of the two outside strips and fold over (see picture below) and clip together. Repeat with all the outside edges. (see picture below)
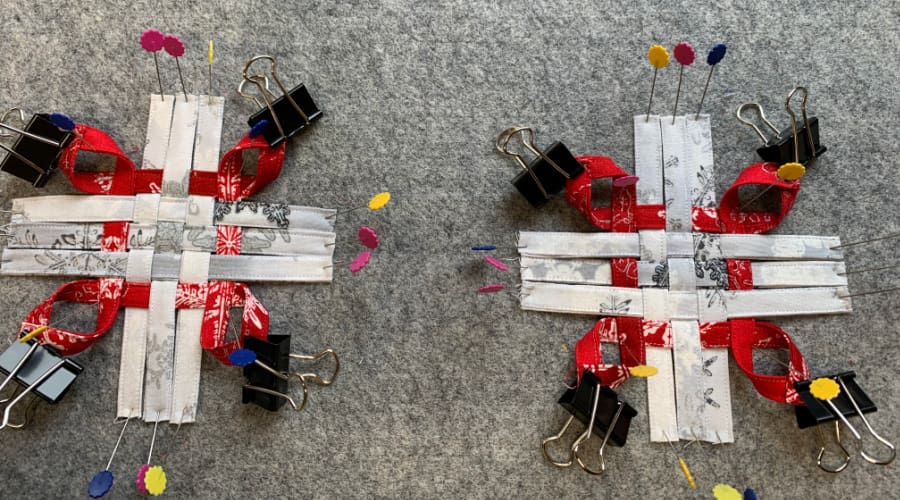
Repeat with the next row which will be the main fabric, don’t forget to glue and pin any of the intersections that lift because they are on the outside of the weave.

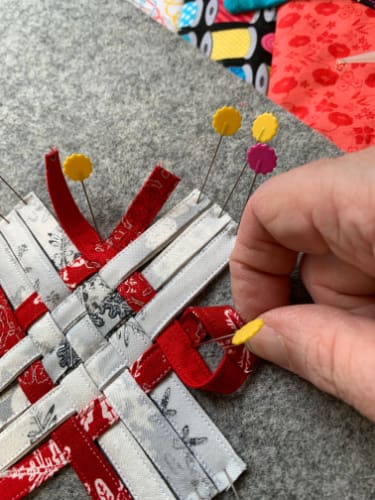
Once complete leave to dry. The Hemline glue was dry enough in about 30 mins. Remove all the pins and clips (scary but it will be fine just clip back again if the glue has not set.) Turn one of your weaves over to put on top of the other and twist around so the straight bits line up with the curled bits. Pull the straight bits through the curled bits.
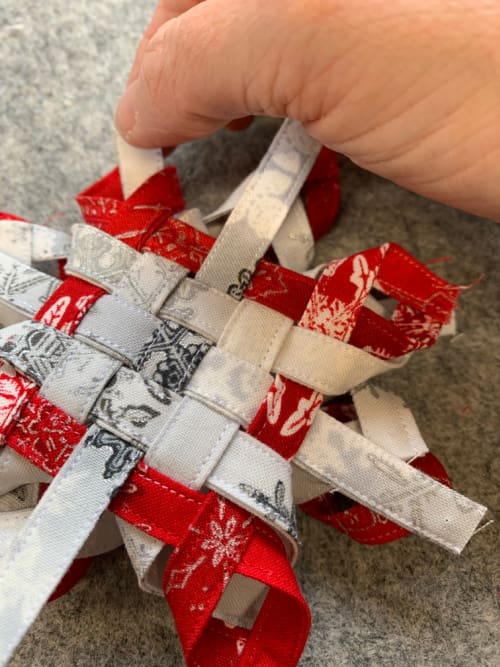
Glue the straight bit to the outside curl and clip. Go all around your star doing this and again leave to dry.
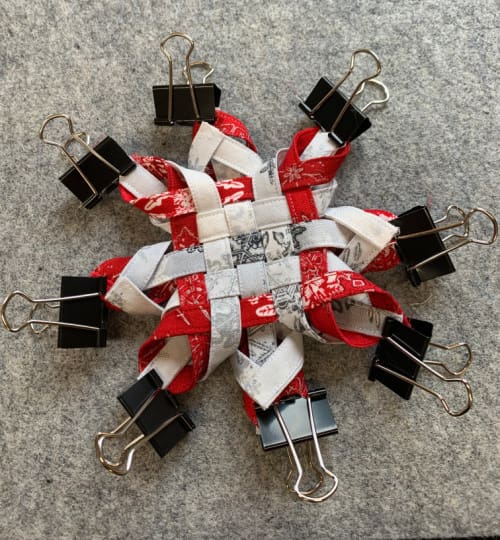
Remove clips and snip off any stray threads and corners from the straight strips. Tie a piece of ribbon or cord to one of the curls to hang the ornament from.
Let me know how you get on, I would love to see pictures of your finished stars.
Quilty Hugs
Mary
One Response
Very easy to follow as the instructions are very clear. I allowed overnight for mine to dry as I used HiTack glue.